Underwater Fluorescence Photography (Reef Raves for Masochists)
Dr. Simon J Pierce is a co-founder of the Marine Megafauna Foundation, where he leads the global whale shark research program, and an award-winning marine wildlife photographer. About Simon.
Fluorescing moray eel at Nosy Sakatia, Madagascar
Bored of simply trying to take good photos, with complicated equipment, while lying suspended in thick liquid, within an unbreathable, alien environment? Don’t worry, I have a solution. We’ll do all of the above… at night. Also, let’s add a thick mask filter so you can’t see properly.
Welcome, gentle reader, to underwater fluorescence photography.
That said, it’s really fun – and kinda sciencey – so it’s no surprise that I’m mildly addicted.
I’ve already written up an article about the biology of underwater fluorescence here on the site, because that’s how we roll here in geektown. In short, I tried an underwater fluorescence dive for the first time at Nosy Sakatia in Madagascar back in 2016. Immediately following the descent I saw a neon orange moray eel, then corals started lighting up everywhere. There was more fluoro than an ’80s aerobics class. I came up feeling like I was drunk. It was wonderful.
I immediately wanted to throw my wallet at the computer screen and buy the gear to photograph it. Thankfully, Jaques Vieira from Sakatia was a fantastic advisor and – after doing all the hard (and expensive) research work himself – he pointed me directly to the supplier of his own favorite gear, Lynn Miner from Fire Dive Gear.
Fluorescent mushroom coral in Raja Ampat, Indonesia
What gear do you need to photograph fluorescence?
Filters. All the filters.
First, you’ll need a blue light source, preferably one that can be easily mounted to your housing or strobe arm, to “activate” fluorescence. Fluorescence is reflected light, where an animal absorbs one color of light (in this case, blue) and re-emits it at a different wavelength, often producing shades of neon green. It’s a totally different biological process to bioluminescence, which is produced internally in an organism through chemical means.
Blue light works better as a light source than UV light, although people often refer to this as “UV diving” regardless.
Nembrotha sp. nudibranch in Raja Ampat
Next, you’ll need a yellow “barrier” mask filter to remove this blue light so you can clearly see the re-emitted fluorescent light. I gave Lynn my mask model – a Cressi Big Eyes Evolution – and he cut out the shape needed. The mask filter comes with an elasticated strip so you can wear it normally over your regular mask, and there’s a neoprene strap so they can all sit comfortably on your head. This neoprene protector is also fluorescent, so if you’re fluoro diving with a buddy you can see each other better.
Alright, now you’ll be able to find fluorescent animals. The next step is to photograph them. For that, you’ll need a dichroic “excitation” filter that fits over your regular strobe (a Sea & Sea YS-D2J in my case), and a yellow barrier filter for your port to cut out most of the blue light.
My current configuration is shown here:
My underwater fluorescence photography setup
For macro photography (all I’ve attempted so far), I’ve been using a single strobe placed directly over the lens to maximize light output. Alex Mustard, in his (amazing) book, Underwater Photography Masterclass, advises “I always shoot fluorescence with strobes on full power, and will often add a third strobe to my rig, to increase the total light output.” I’ve only got the one strobe filter at this stage, so I leave it on full power and – when in the water – have it set directly above the port. You can see the 67 mm yellow “barrier” filter on my Nauticam macro port for the Sony 90 mm lens above.
The 90 mm lens can be a bit too much reach for fluoro – something like a 50-60 mm, or thereabouts, kinda feels like it would be better as it would allow me to get closer to larger subjects. I haven’t tried that yet though. I’d really like to try wide-angle fluoro, using yellow filter paper in the rear filter holder on my Canon 8-15 mm lens, but I’m waiting to get a second strobe filter so I can get more light on the subject.
When I returned to Madagascar with all this gear, Jacques noticed that my strobe had some white light leakage out of the sides when it fired. That white light can spoil the photo, so I’ve cut apart a neoprene bootie and use the heel as a black sleeve to cover the front half of the strobe (as seen above).
On the other strobe arm I’ve got my blue light. Lynn included an excitation filter on that, too, but unfortunately it shattered in my checked bag due to a lack of care on my part. It does work okay without it. I keep that on my regular macro arm setup to keep the kit near-neutrally buoyant underwater, but also so that I can move the blue light back if it’s affecting the animal’s behavior. Lizardfish and goatfish, among others, show no obvious reaction to the blue light. Small moray eels, which fluoresce like crazy and look totally amazing, hate it. It’s much better to be able to move it right back so it doesn’t annoy them, but so that you can still see the subject.
I keep my dive computer (a Shearwater Perdix AI) on my strobe arm so that I can monitor dive time and air easily. It’s easy to read the display, but it’s not annoying. In contrast, both the bright green “ready” light on the strobe and the green “vacuum seal” light on the housing are rather distracting. I use black electrical tape to cover them while I’m underwater.
I’ve obviously got a completely ridiculous high-end mirrorless setup (Sony A7rIII camera in a Nauticam NA-A7RIII housing) that is worth substantially more than my car. Some of my first photos were taken with a slightly less expensive, but still fairly ridiculous Olympus OM-D E-M1 setup. Serious underwater photography is basically (and somewhat literally) throwing your money into the ocean. Fortunately, there are some far cheaper options available for getting into underwater fluorescence photography.
The Olympus “Tough” series, currently the TG-6, is the go-to first underwater camera for many photographers. There’s an Ikelite kit for the camera that Underwater Photography Guide recently called “the easiest underwater photography fluorescence kit.”
The other go-to starter option is, of course, the GoPro. Fluorescence filters are also available for those too (at Backscatter). There are some setup tips for filming fluorescence with a GoPro here.
Camera Settings
I’m still getting to grips with what settings to use.
My starting setting right now is 1/80 sec, f/14, 1600 ISO. I’ve tried opening up the aperture a bit, but there’s minimal depth of field on the Sony 90 mm lens on full-frame at the best of times. The strobe is set to fire at full power.
Normally I use low ISOs for macro photography – you can check out my normal settings here – but I’ve been using far higher ISOs for fluorescence at night.
I’ve switched to using full manual focus with the Sony 90 mm as I find it difficult (and annoying) to autofocus consistently with that lens on the Sony A7rIII camera. I suspect that the low light that is integral to fluoro photography is going to challenge most autofocus systems, to be fair. Anyway, I’ve got the Nauticam manual focus gear, and the A7rIII has excellent manual focus aids. I use red peaking set to High, so I can see what’s in focus, and when I start moving my focus plane a handy line appears on the LCD to show me which direction I’m moving (in or out), which I still find useful at this point.
One additional frustration is that the low gearing on the focus knob / focus gear means the focus plane changes reeeeeally slowly, but it looks like Nauticam has fixed this on the newer housing for the Sony A7rIV.
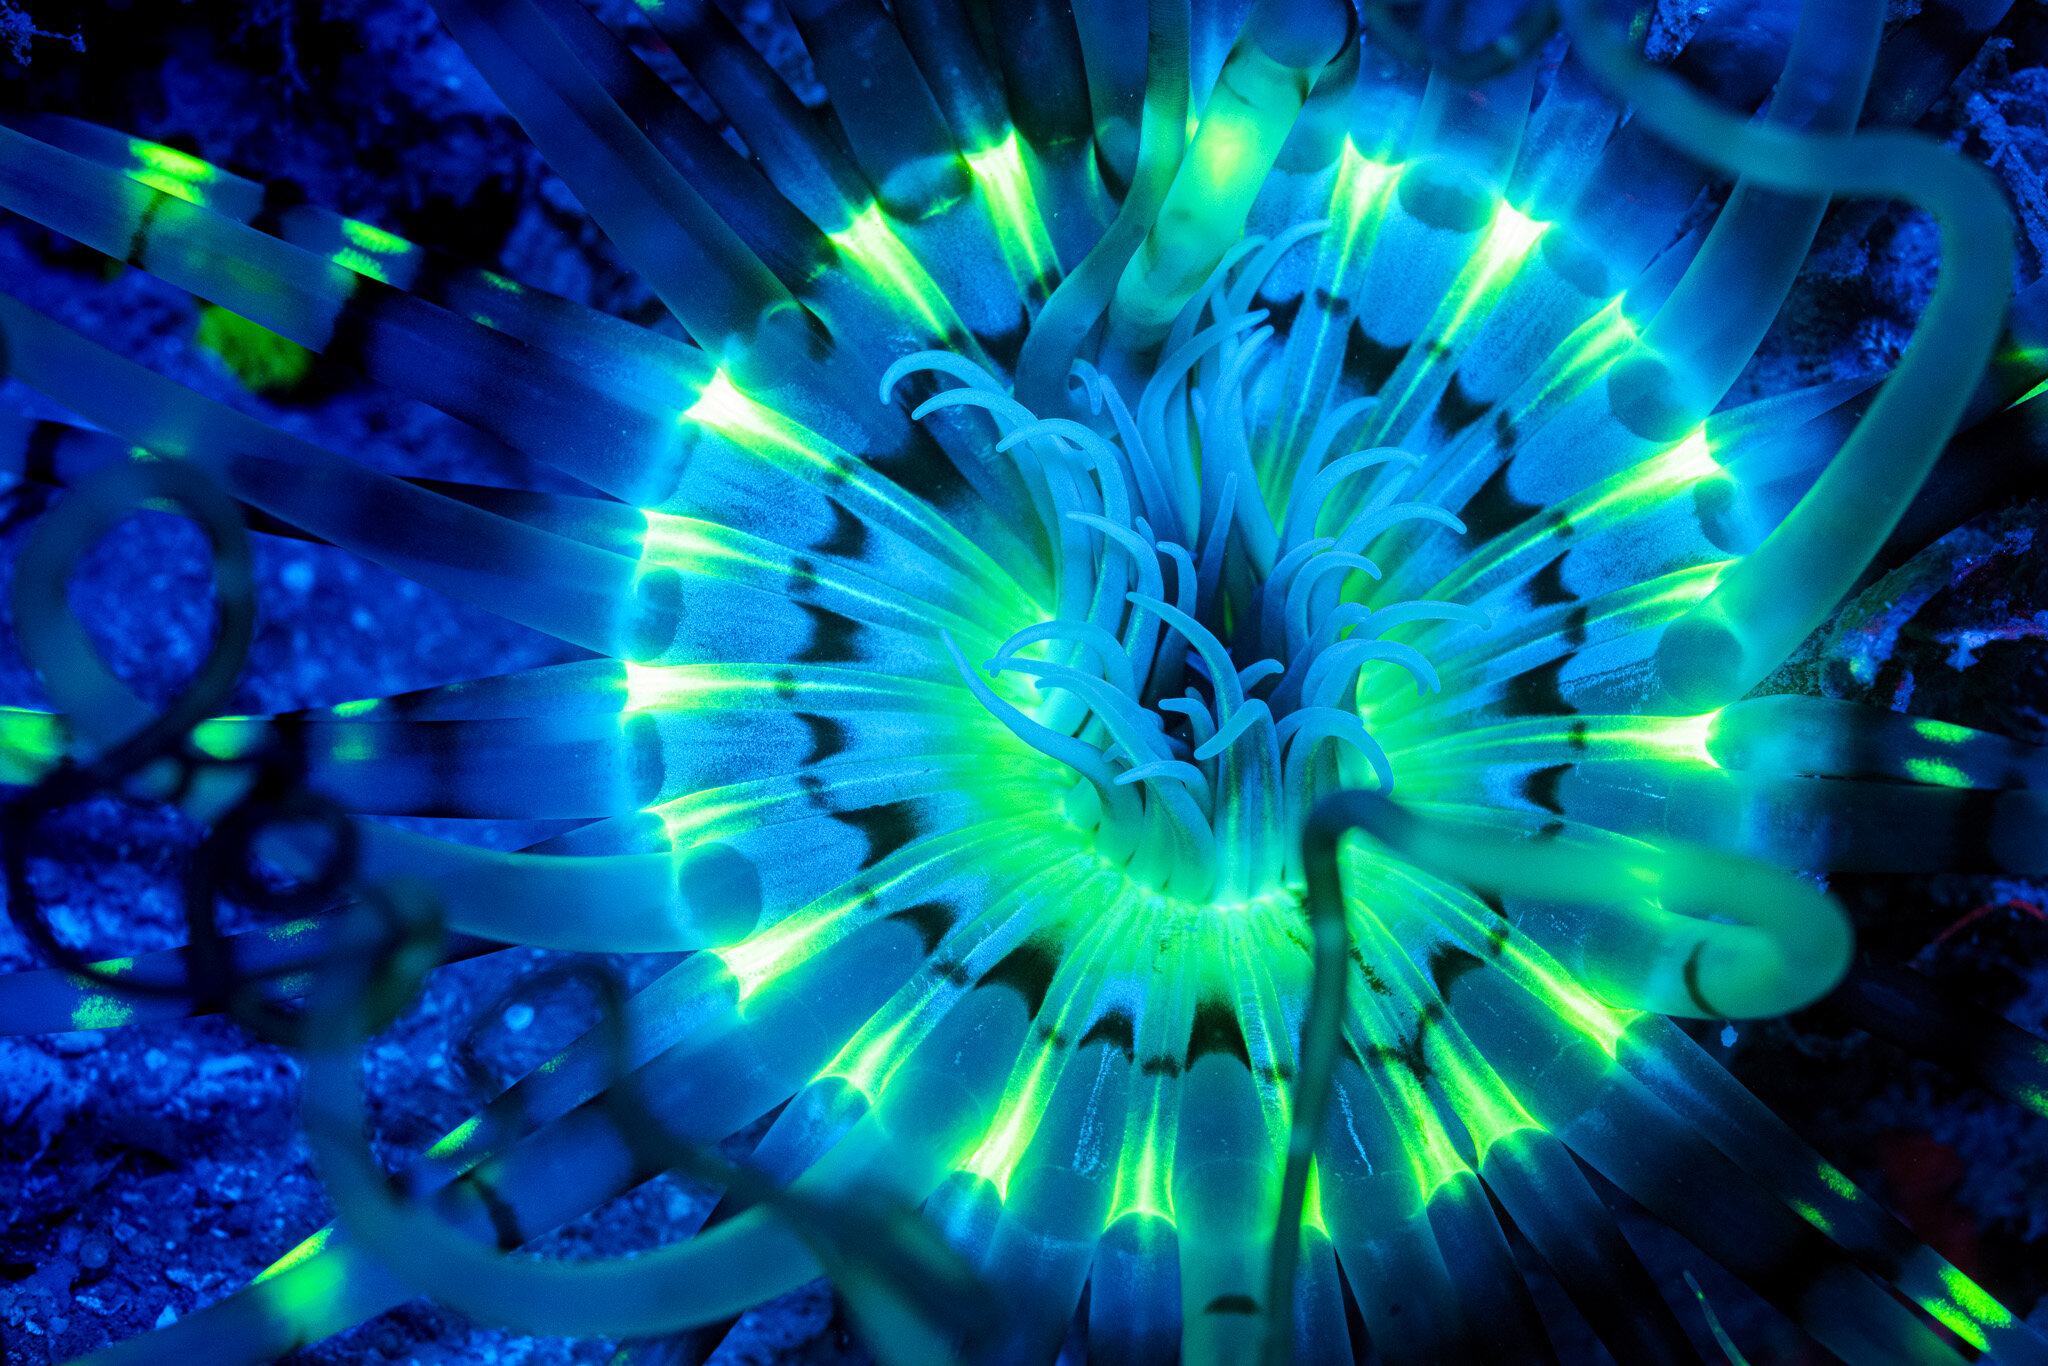
Sea anemone fluorescence under blue light at Nosy Sakatia, Madagascar
Practical tips
Don’t try fluoro diving unless you’ve got good buoyancy. You can still see what’s around you, but everything that doesn’t fluoresce – including delicate reef structures – will just be a dark blue.
Fluoro diving over a full coral reef looks epically amazing – it’s like watching the night scene in Avatar – but for photography, it’s difficult to find the little critters I want to photograph with the whole scene glowing brightly. It’s actually easier to swim over to the sand, on the edge of the reef, and search that area. Some fluorescence, like corals and anemones, can be gloriously obvious. Other critters, such as crabs and mantis shrimps in burrows, can be rather subtle. Don’t move too fast, and scan the substrate.
Fluoro diving over a full coral reef looks epically amazing – it’s like watching the night scene in Avatar
Fluorescing coral at Nosy Sakatia, Madagascar
Scientists are still identifying which animals do and don’t fluoresce, and why, and it’s an interesting exercise for a noob like me. Cryptic fish, like lizardfish and small morays, often fluoresce really well. Big morays don’t, and I haven’t seen any pelagic fish fluoresce yet (that would be cool). I was hoping that the “walking sharks” (Hemiscyllium spp.) in Raja Ampat would fluoresce, but no luck. Sad face. That’s a good thing to be aware of – a lot of really neat stuff doesn’t fluoresce, so if you’re at an awesome critter destination like Tulamben it’s good to do at least a few “white light” night dives too!
I’ll keep updating this page as I learn more. Hope you find it useful!
Simon.
Useful Pages, Articles & Resources:
Jacques Vieira’s Facebook Page: Fluorescence Diving Madagascar Nosy Be
Fire Dive Gear (where I’ve bought my fluorescence photography equipment)
Underwater Photography Masterclass book by Alex Mustard – advice on fluorescence photography, and everything else.
Sport Diver: Underwater Photography Tips – Fluorescence


