Underwater Wide-Angle Photography with the Sony A7R III
Dr. Simon J Pierce is a co-founder of the Marine Megafauna Foundation, where he leads the global whale shark research program, and an award-winning marine wildlife photographer. About Simon.
I’ve written (and routinely update) this article so that (1) it’s easy to refer people with questions about the gear I use, and how I set it up, and (2) I can remember what settings I use, too. A lot of customization is possible with the Sony menu system, which is brilliant… but makes it hard for me to keep track if there are a few months between dives!
While this post focuses specifically on how I use my Sony A7R III camera for underwater wide-angle photography, cameras are cameras. Many concepts here should be relevant to using any given system underwater.

I love Nauticam underwater housings, and use a Nauticam NA-A7RIII housing with the A7R III.
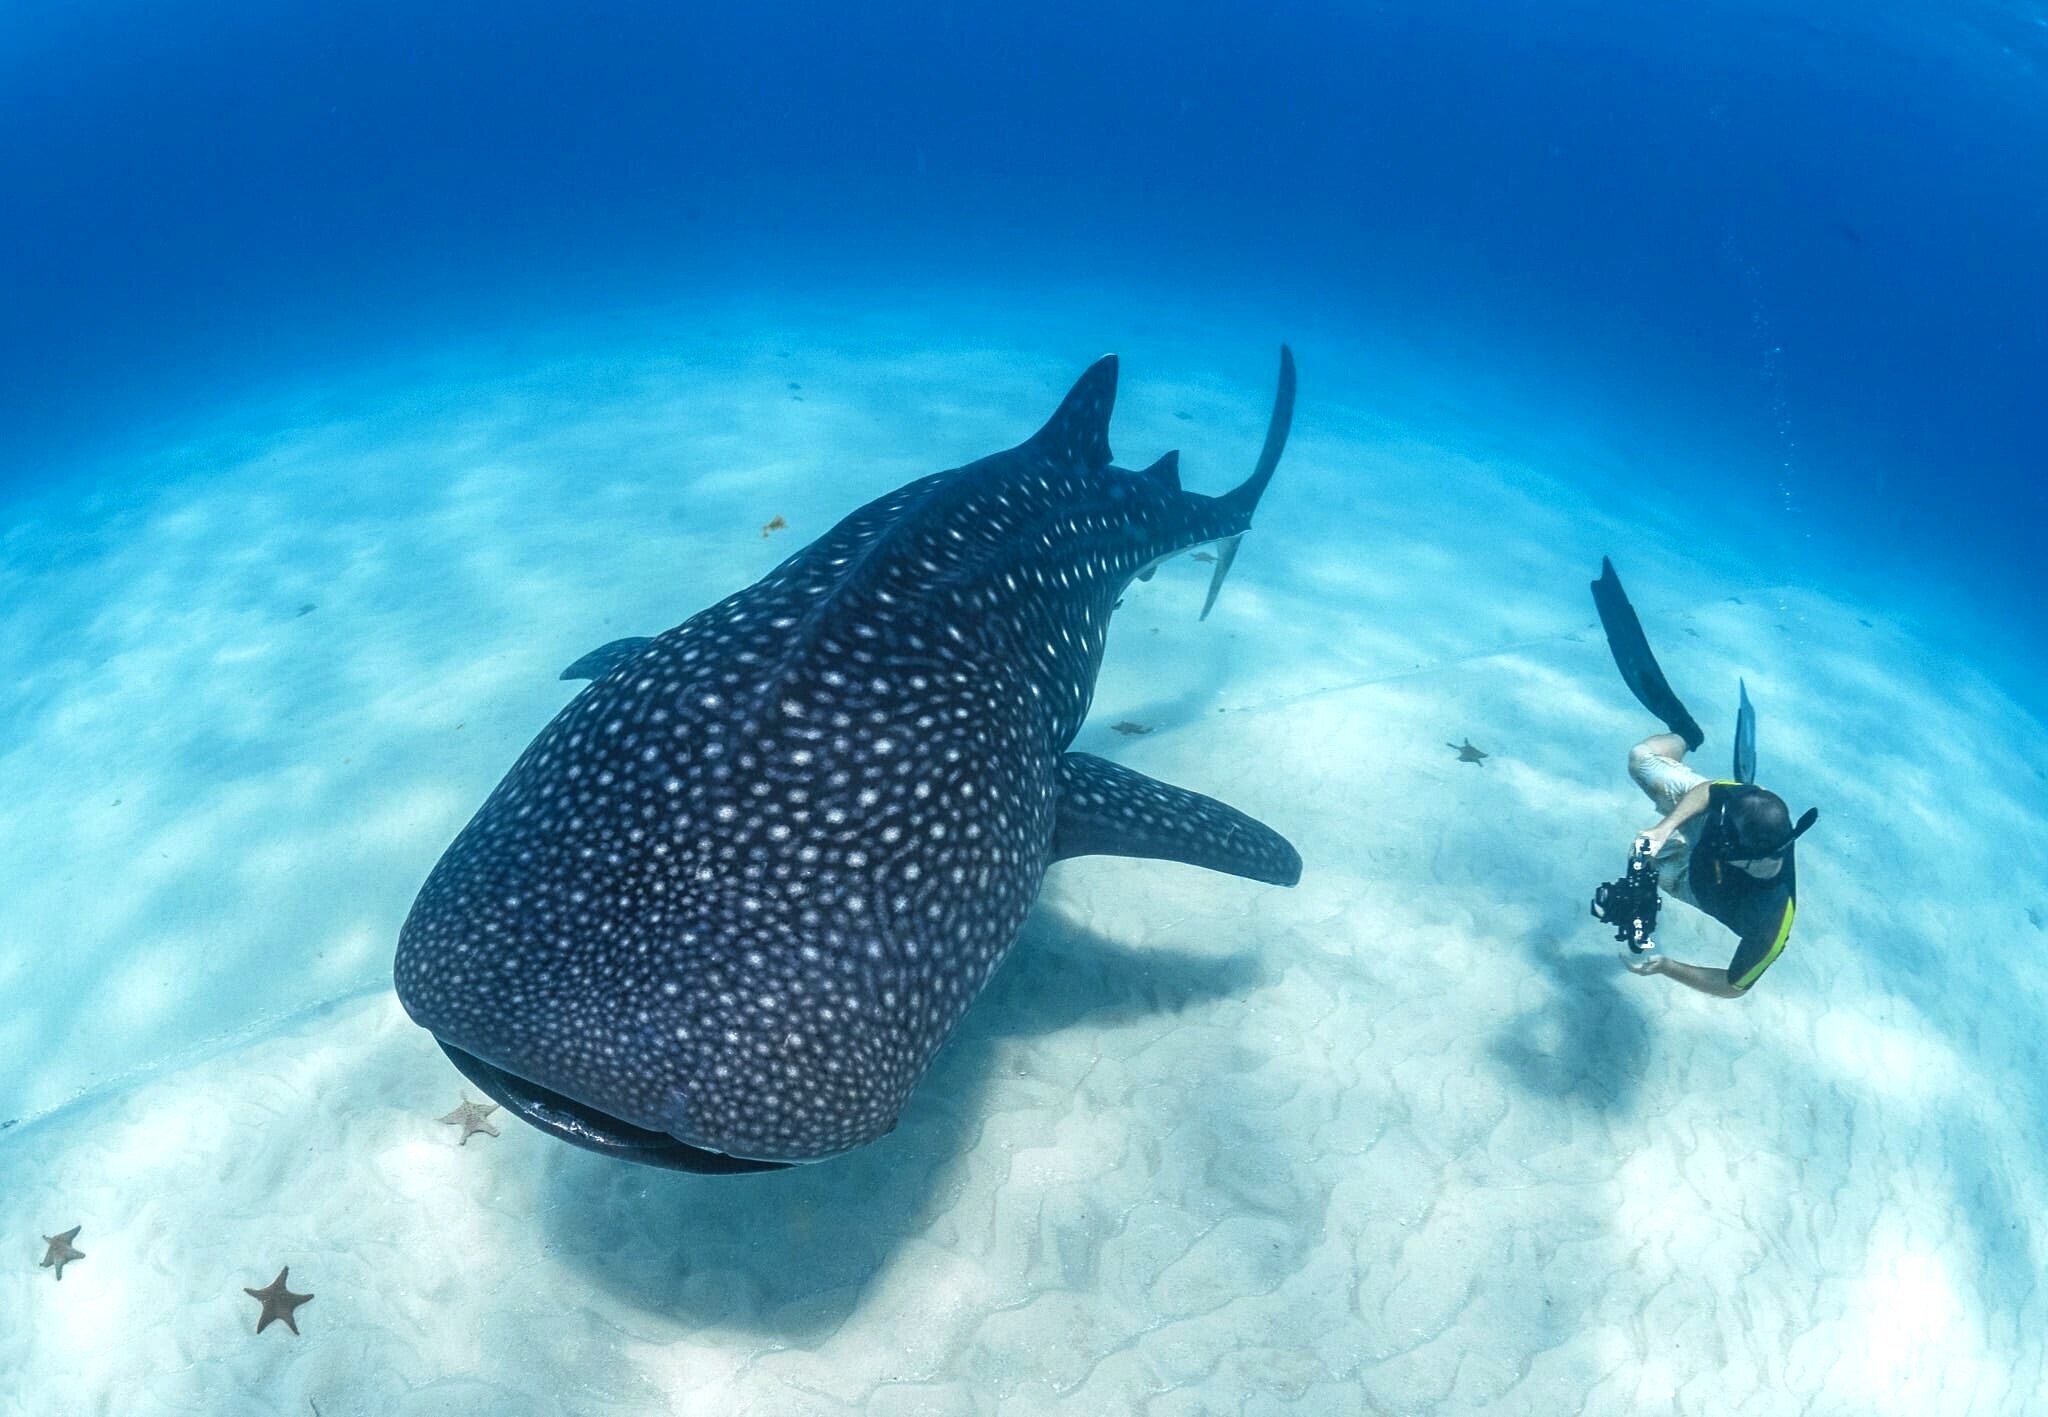
I’m a big fan of ultrawide fisheye lenses, as I spend a lot of time with large animals (particularly whale sharks, as I’m a whale shark researcher). Sony still doesn’t have a ‘native’ fisheye lens at this stage, so I use a Canon 8-15 mm fisheye lens (using a Metabones V adapter) with a Nauticam N120 140 mm optical glass fisheye dome port and 30 mm extension ring.
As an FYI, I always use the LCD screen to compose my shots. Nothing against viewfinders – I’m just used to it. I started my underwater photography with small cameras that only had a rear screen. I also shoot one-handed a lot, and the screen allows me to hold the camera out from my body while still viewing my composition. The Nauticam housing has a little base plate for the camera that holds the screen out at an angle, making it easier to see, and also disabling the auto-switch function between the LCD and viewfinder.

Shooting in natural light
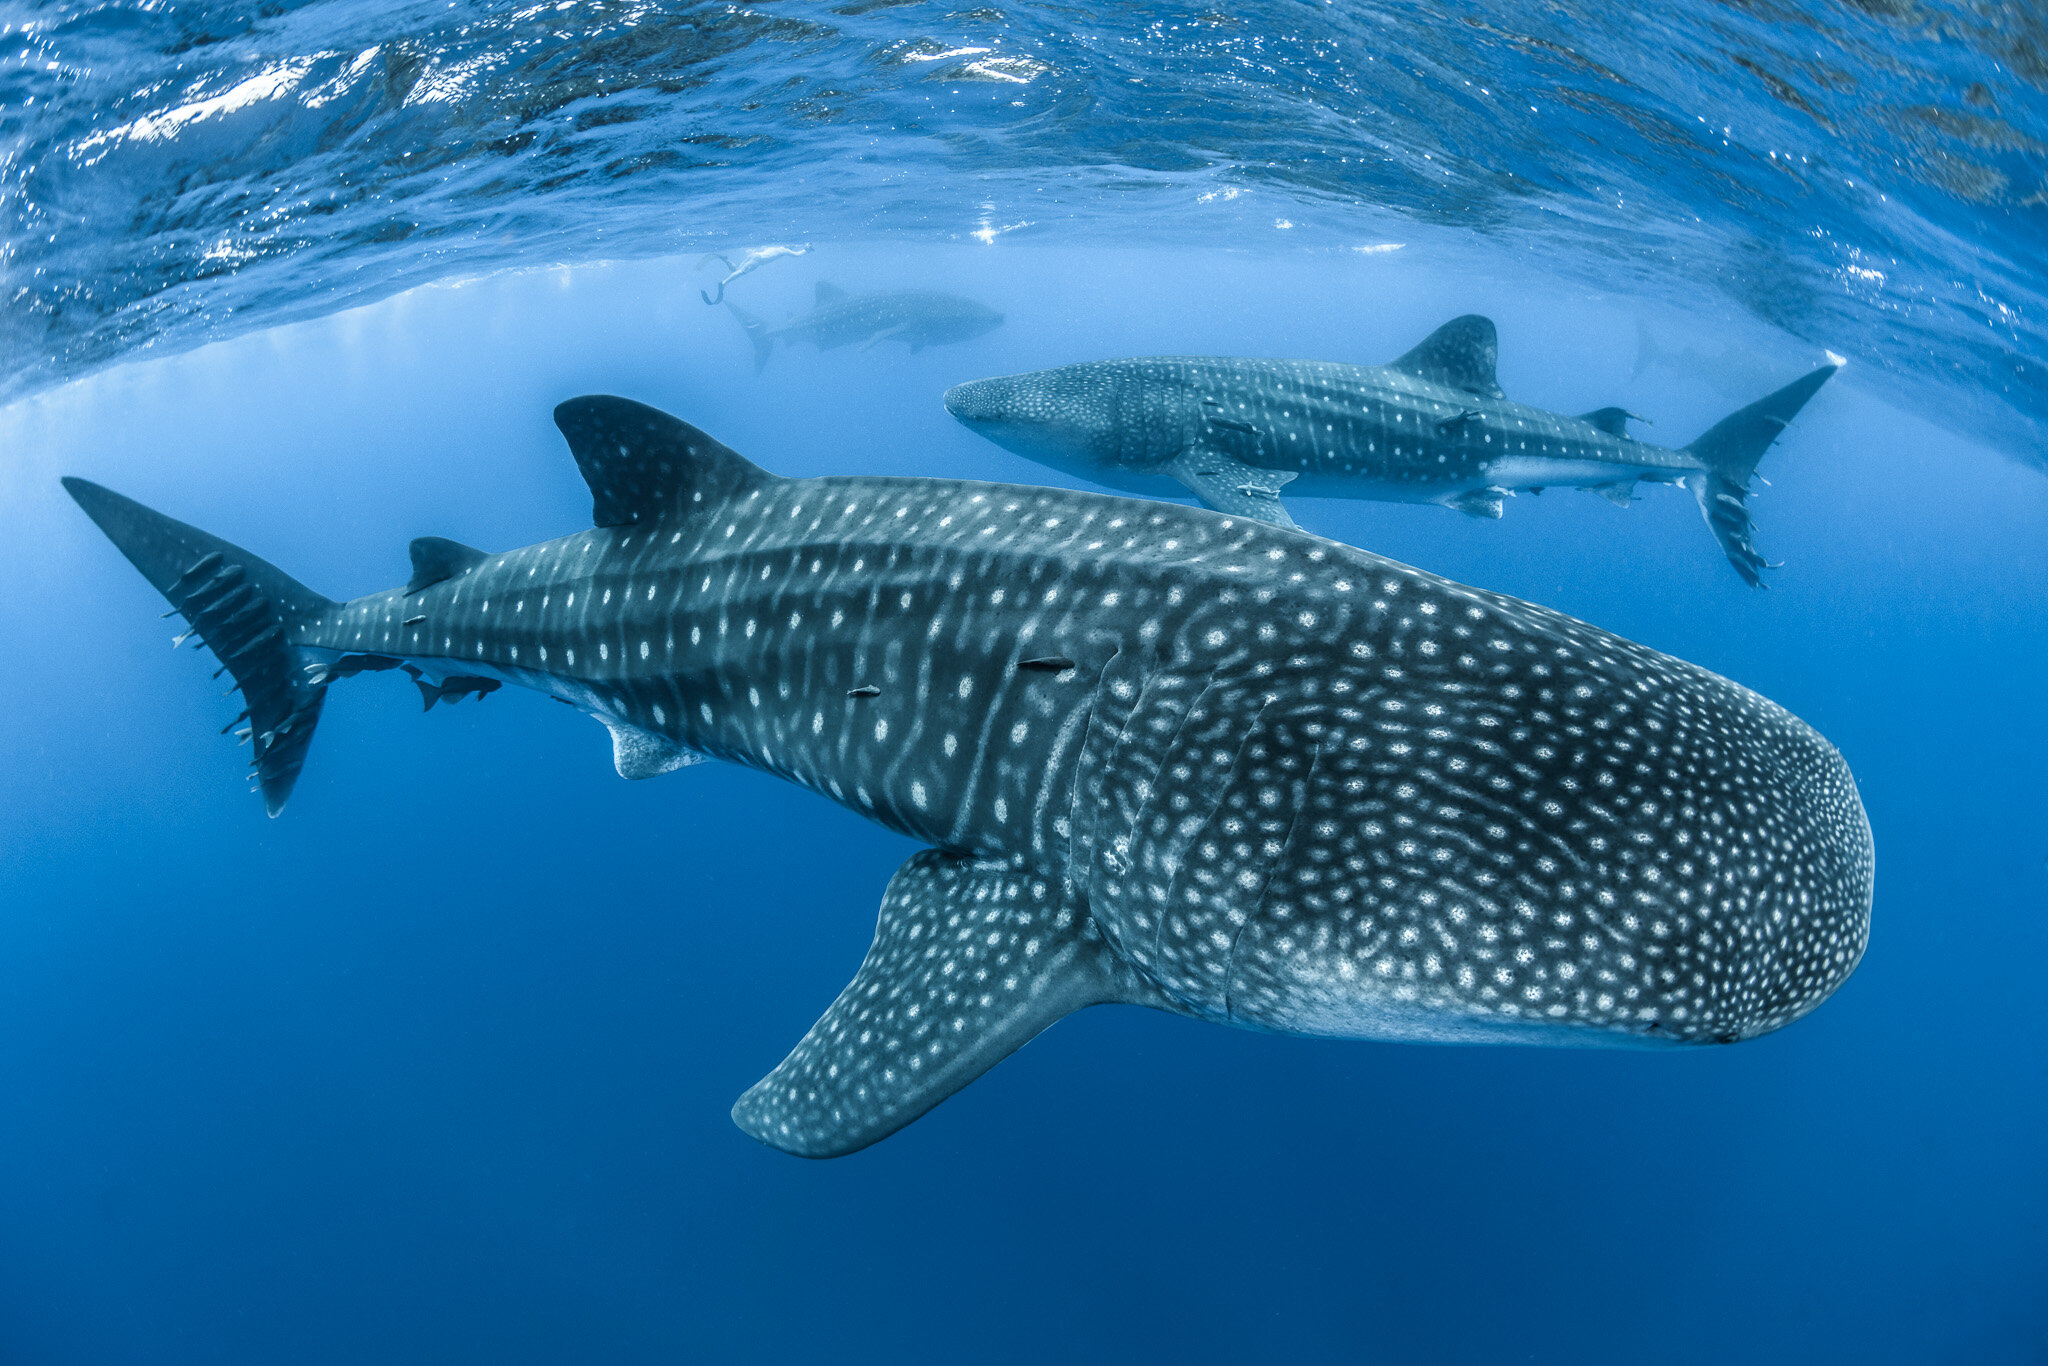
When I’m shooting large, slow marine animals, such as whale sharks, in good ambient light near the surface, my standard settings are 1/250 sec and f/8, in manual mode, with Auto ISO and -1.0 exposure compensation to help protect my highlights.
I use a High frame rate (8 shots per second) and continuous autofocus (AF-C). I’ve set “Priority Set in AF-C: Release” to minimize the lag time when I mash the shutter lever; the autofocus is normally fast, and I use “Lock-on: Wide” most of the time.

Why f/8? The A7R III is limited to f/8 or wider aperture values to maintain phase-detect autofocus in continuous shooting mode. At f/9, for instance, it will stay focused at the same distance that focus was initially achieved. Not useful when an animal is approaching you. It’s fine if you’re just taking photos one at a time (as I do when shooting with strobes, below), rather than shooting in bursts.
I use compressed raw files if I’m expecting any kind of fast action. I don’t notice any loss of quality in real-world shooting. What I do notice is that uncompressed raw files are ~82 MB in size, so the camera can’t keep up 8 fps for long – about 28 photos – when it’s moving that much data, and the buffer takes approximately 14 seconds to clear. This feels like an eternity sometimes! The reduced file size from compressed raw increases the buffer depth (to around 76 photos) so I can keep shooting instead of swearing vigorously through my snorkel. You’ll need a UHS-II SD card to help with that, too. I use a 256 GB ProGrade card.
I don’t often change these settings. If I’m on a scientific expedition then I’m often taking photos of other researchers at work, so I’d rather be able to focus on composition – and trying to keep up! On that topic, I also want to have a secure hold on the camera, and adding a hand strap to the handle helps a lot with that.

I’ll increase the shutter speed for fast-swimming animals, like dolphins and sea lions, where I can get away with it. Obviously I’ll also decrease the shutter speed (or aperture) in low light if I absolutely have to.
Auto ISO is super helpful, particularly with Sony’s great sensor. I have no problem using ISO 3200 underwater; I’ll just add minor noise reduction in DxO Pure Raw 2 or Lightroom afterward if necessary.
As an aside, I’ve been (metaphorically) diving into the confusing subject of ISO invariance and my understanding is that, above dual gain kicking in at ISO 640, the A7R III is effectively just increasing brightness. There’s an argument, then, for setting Auto ISO to 100–640 when using manual settings (as above). and adjusting the exposure in Lightroom later. That should then optimize data capture while protecting highlights. Good in theory.
However, I tried this with whale sharks in Tanzania and found that – in dark conditions (rain, or early mornings) – the autofocus struggled a lot more than usual. I’ll stick to Auto ISO with 100–3200 in the future.

I use ambient light for wide-angle photography when we’re also filming, as I don’t want my strobe flashes to ruin the shot. It’s often dark underwater in some places we work, either because of overcast skies or deeper dives (often both), so I’ll commonly drop down my shutter speed to 1/160 sec to reduce ISO levels a bit.

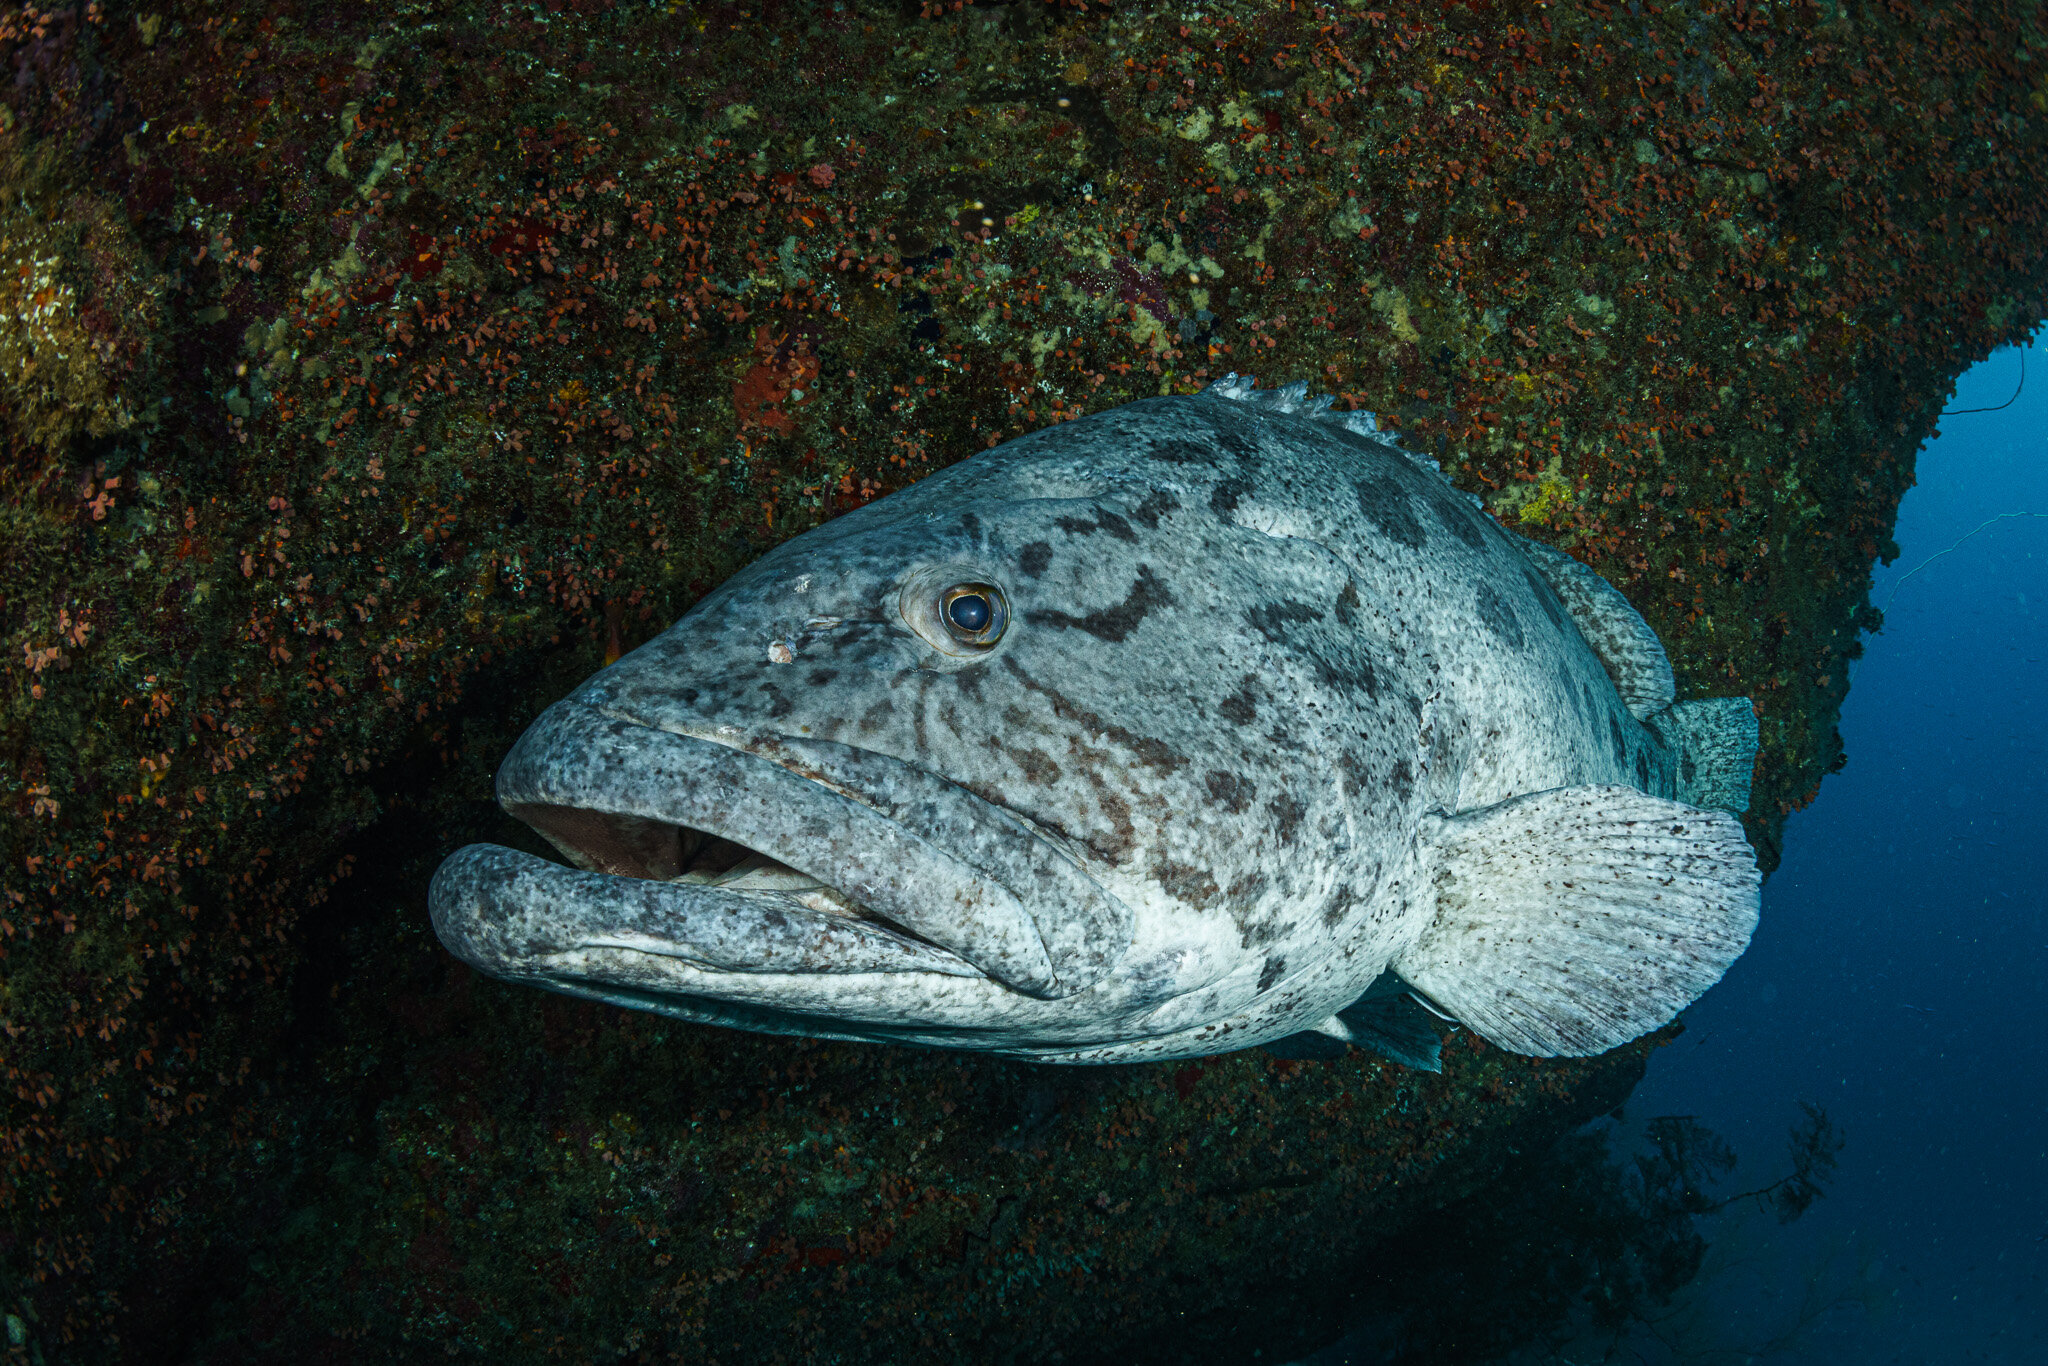
Shooting with strobes
I use dual Sea & Sea YS-D2 strobes (now superseded by the YS-D2J) with Eneloop Pro batteries, a Sony flash trigger, and Nauticam optical sync cables. Note that YS-D2s previously weren’t compatible with the flash trigger, and some shops still list this on their sites, but they are compatible with the most recent Nauticam optical sync cables. I usually use Glow Dive diffusers on the YS-D2s, which work well but definitely reduce the light output.
My “jump” settings are normally 1/125 sec, f/10 and ISO 200 (in Manual mode). I normally use Fill Flash, with the strobes set to 16, as my initial setting.
I’ve got a simple process when I’m shooting:
I “fix” my aperture at a setting that should get me reasonably sharp corners, often f/10.
I choose a shutter speed that will freeze the motion of whatever subject I’m planning to photograph, often starting at 1/125 sec.
I’ll check what ISO I need to get a nice background exposure (using “Shot. Result Preview”, as described below).
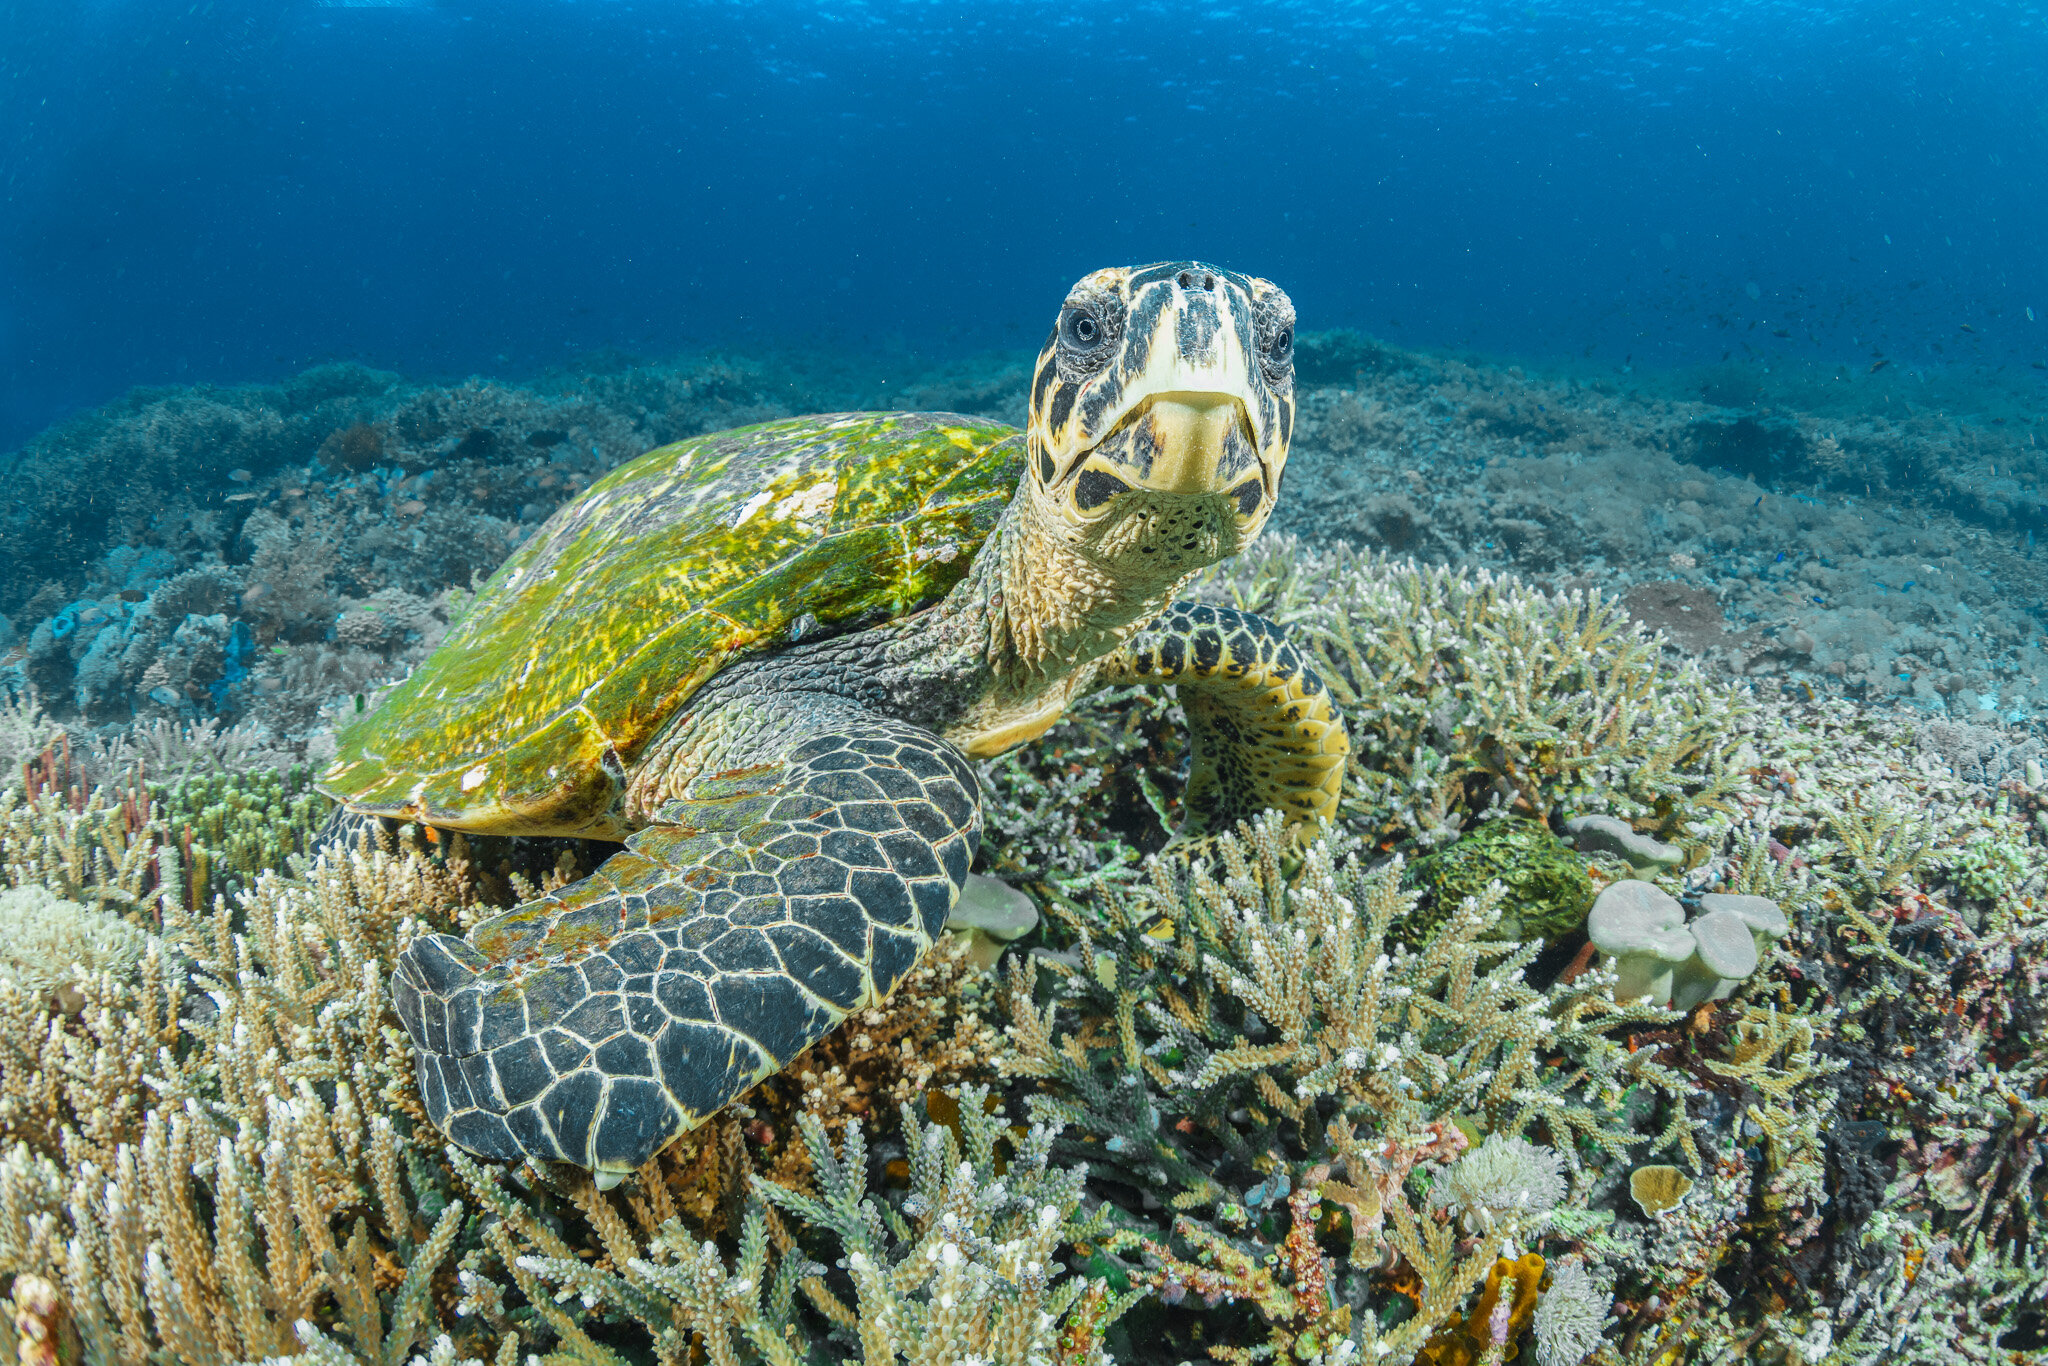
Then, I adjust my strobe(s) power to add some nice light to the foreground, depending on what I want to shoot and (especially) the distance from the subject. I usually test things out when I first get to the bottom, by photographing a rock or coral, then I can start looking for interesting critters
It’s easiest to do all that in manual mode so I can easily work out what I need to change. Background too dark? Increase ISO or decrease shutter speed. I find it easiest to change shutter speed for quick background exposure corrections, as that doesn’t affect the strobe lighting on the foreground. Increasing ISO, or dropping aperture, will increase perceived strobe output – or vice versa.
I’ve set the AEL button to ISO so it’s easily accessible on the housing. I’ll often adjust exposure using ISO until that hits around 640 (see my note on ISO invariance above). At that point, I’ll start reducing shutter speed or aperture (if it gets really dark, or if I decide corner sharpness isn’t a big deal).
There are often times when I want to switch both strobes off, temporarily, at once – for instance if I want to take a silhouette photo. The quickest way to accomplish this, that I’ve found so far anyway, is to switch to silent shutter – then the strobes don’t work. I’ve got that programmed to the C4 / Trash button.

I shoot in uncompressed raw when I’m shooting with strobes, as I’m only taking one shot at a time, and set Auto Review to 2 seconds so I can check exposure.

Note that you have to pull the strobes well back – with the front of the strobe slightly behind the handles – to avoid lighting up the sides of the image. (I’m writing this as a reminder to myself, as they’re never back far enough…)

One of the great things about shooting mirrorless is the “what you see is what you get” when using the EVF or LCD. However, it’s helpful to switch this off (“Live View Display: Setting Effect OFF“) when shooting with strobes. Otherwise, the screen can be too dark to compose a shot easily.
Of course, you do want to see how your exposure settings are affecting your background, and there’s a neat way to accomplish this: program your AF-ON button (accessed via the thumb lever on the Nauticam housing to “AF-ON Button: Shot. Result Preview“. That means you can quickly check your ambient light exposure by just pressing your thumb, rather than taking a photo and checking it. (Of course, that only works if you’re using shutter-linked autofocus.)
I’ve been playing around with automating my exposure settings more. When we’re working with whale sharks in the Galapagos, in particular, we’re changing depth and, with it, ambient lighting level at a speed that I find difficult to keep up with (while kicking madly to keep up with a bus-sized fish).
I’ve trialed using Auto ISO and negative exposure compensation – conveniently accessed via a dial on the housing – and that works quite well, as long as I keep an eye on the background exposure (using the thumb lever with Shot. Result Preview, as above). I still have to make adjustments, but it does get it approximately right in a hurry. I normally start with -1.0 exposure compensation and adjust it from there.

Camera settings for all occasions
I’m often shooting one-handed, as noted above, so I use shutter-linked autofocus.
I’ve got the “Pwr Save Start Time” – i.e., camera sleep time – set to one minute. I don’t turn the camera off while I’m in the water, so this conserves battery during lulls.
I set my white balance to “Cloudy”. That adds a slight warming effect to underwater images to help counter the blue-green ocean (though I’ll usually adjust white balance slightly in Lightroom anyway).

I use “Multi” metering so the camera is considering the whole frame (though I’m often shooting in manual anyway). The default setting is for exposure to be locked while the shutter is depressed. I’ve switched that off (“AEL w/shutter: Off“) so the camera is continuously evaluating the scene even when I’m shooting a burst of images.
The “Creative Style” on the camera, applied to the embedded jpegs in the raw files, is set to Standard. I always post-process my photos in Lightroom so I don’t want the camera to be adding its own edits.
I find it all too easy to bump settings in the boat or water, so I disable any buttons that I’m unlikely to be using.

If you want to learn or improve your underwater photography, I highly recommend Alex Mustard’s book: Underwater Photography Masterclass. It’s a fantastic guide to a rather technical subject!
A few more miscellaneous notes:
I set Auto Review to 2 Sec, so I can check things by eye when required.
I set Drive Mode to Single Shooting with strobes. Otherwise, the strobes can get out of sync due to minor variations in recycle times.
It’s easy to accidentally hit the movie lever. I normally switch that off and use a GoPro for video.
I’ve set my defaults to the MR 1 dial position, which saves most things, except shutter-linked autofocus and other button customizations.
Hope the above is useful – I’m still working things out as I go, but I do love the functionality and customization opportunities with the Sony A7R III, and how the Nauticam housing lets me access key options quickly and easily. Ergonomics count for a lot, peeps.
Any questions or suggestions? Let me know in the comments!
Simon.