Sony 135 f/1.8 GM Lens: Wildlife Photography Notes
Portrait lenses are catnip for ‘people photographers’, but why should they have all the fun amiright?
Plenty of wildlife photographers, including me, were drooling when the 135 f/1.8 G Master lens was released. This is one of the sharpest lenses ever tested and has dual internal focus motors to take advantage of the latest Sony cameras’ blazing autofocus speeds. The f/1.8 aperture is brilliant at throwing the background out of focus (bokeh), while being able to maintain relatively fast shutter speeds in low-light conditions.
I’m a Sony Digital Imaging Advocate, helping people to get the best out of their Sony gear for wildlife photography, so I pitched the wonderful folk at Sony New Zealand that it was absolutely vital I should familiarise myself with this exceptional lens so that I can provide practical advice on its use.
Fortunately, they believed me, so here we are.

Sony 135 mm GM lens (with lens hood attached)
Who is the 135 mm G Master lens for?
This is a specialist lens, designed to net you shots that other lenses can’t. While it’s extremely sharp, all of Sony’s GM and G lenses are fantastic in that regard. For me, the killer feature in the 135 mm is that f/1.8 aperture.
The small aperture number means the lens can let a lot of light in. Here’s a useful shot from Wikimedia to help visualise this:
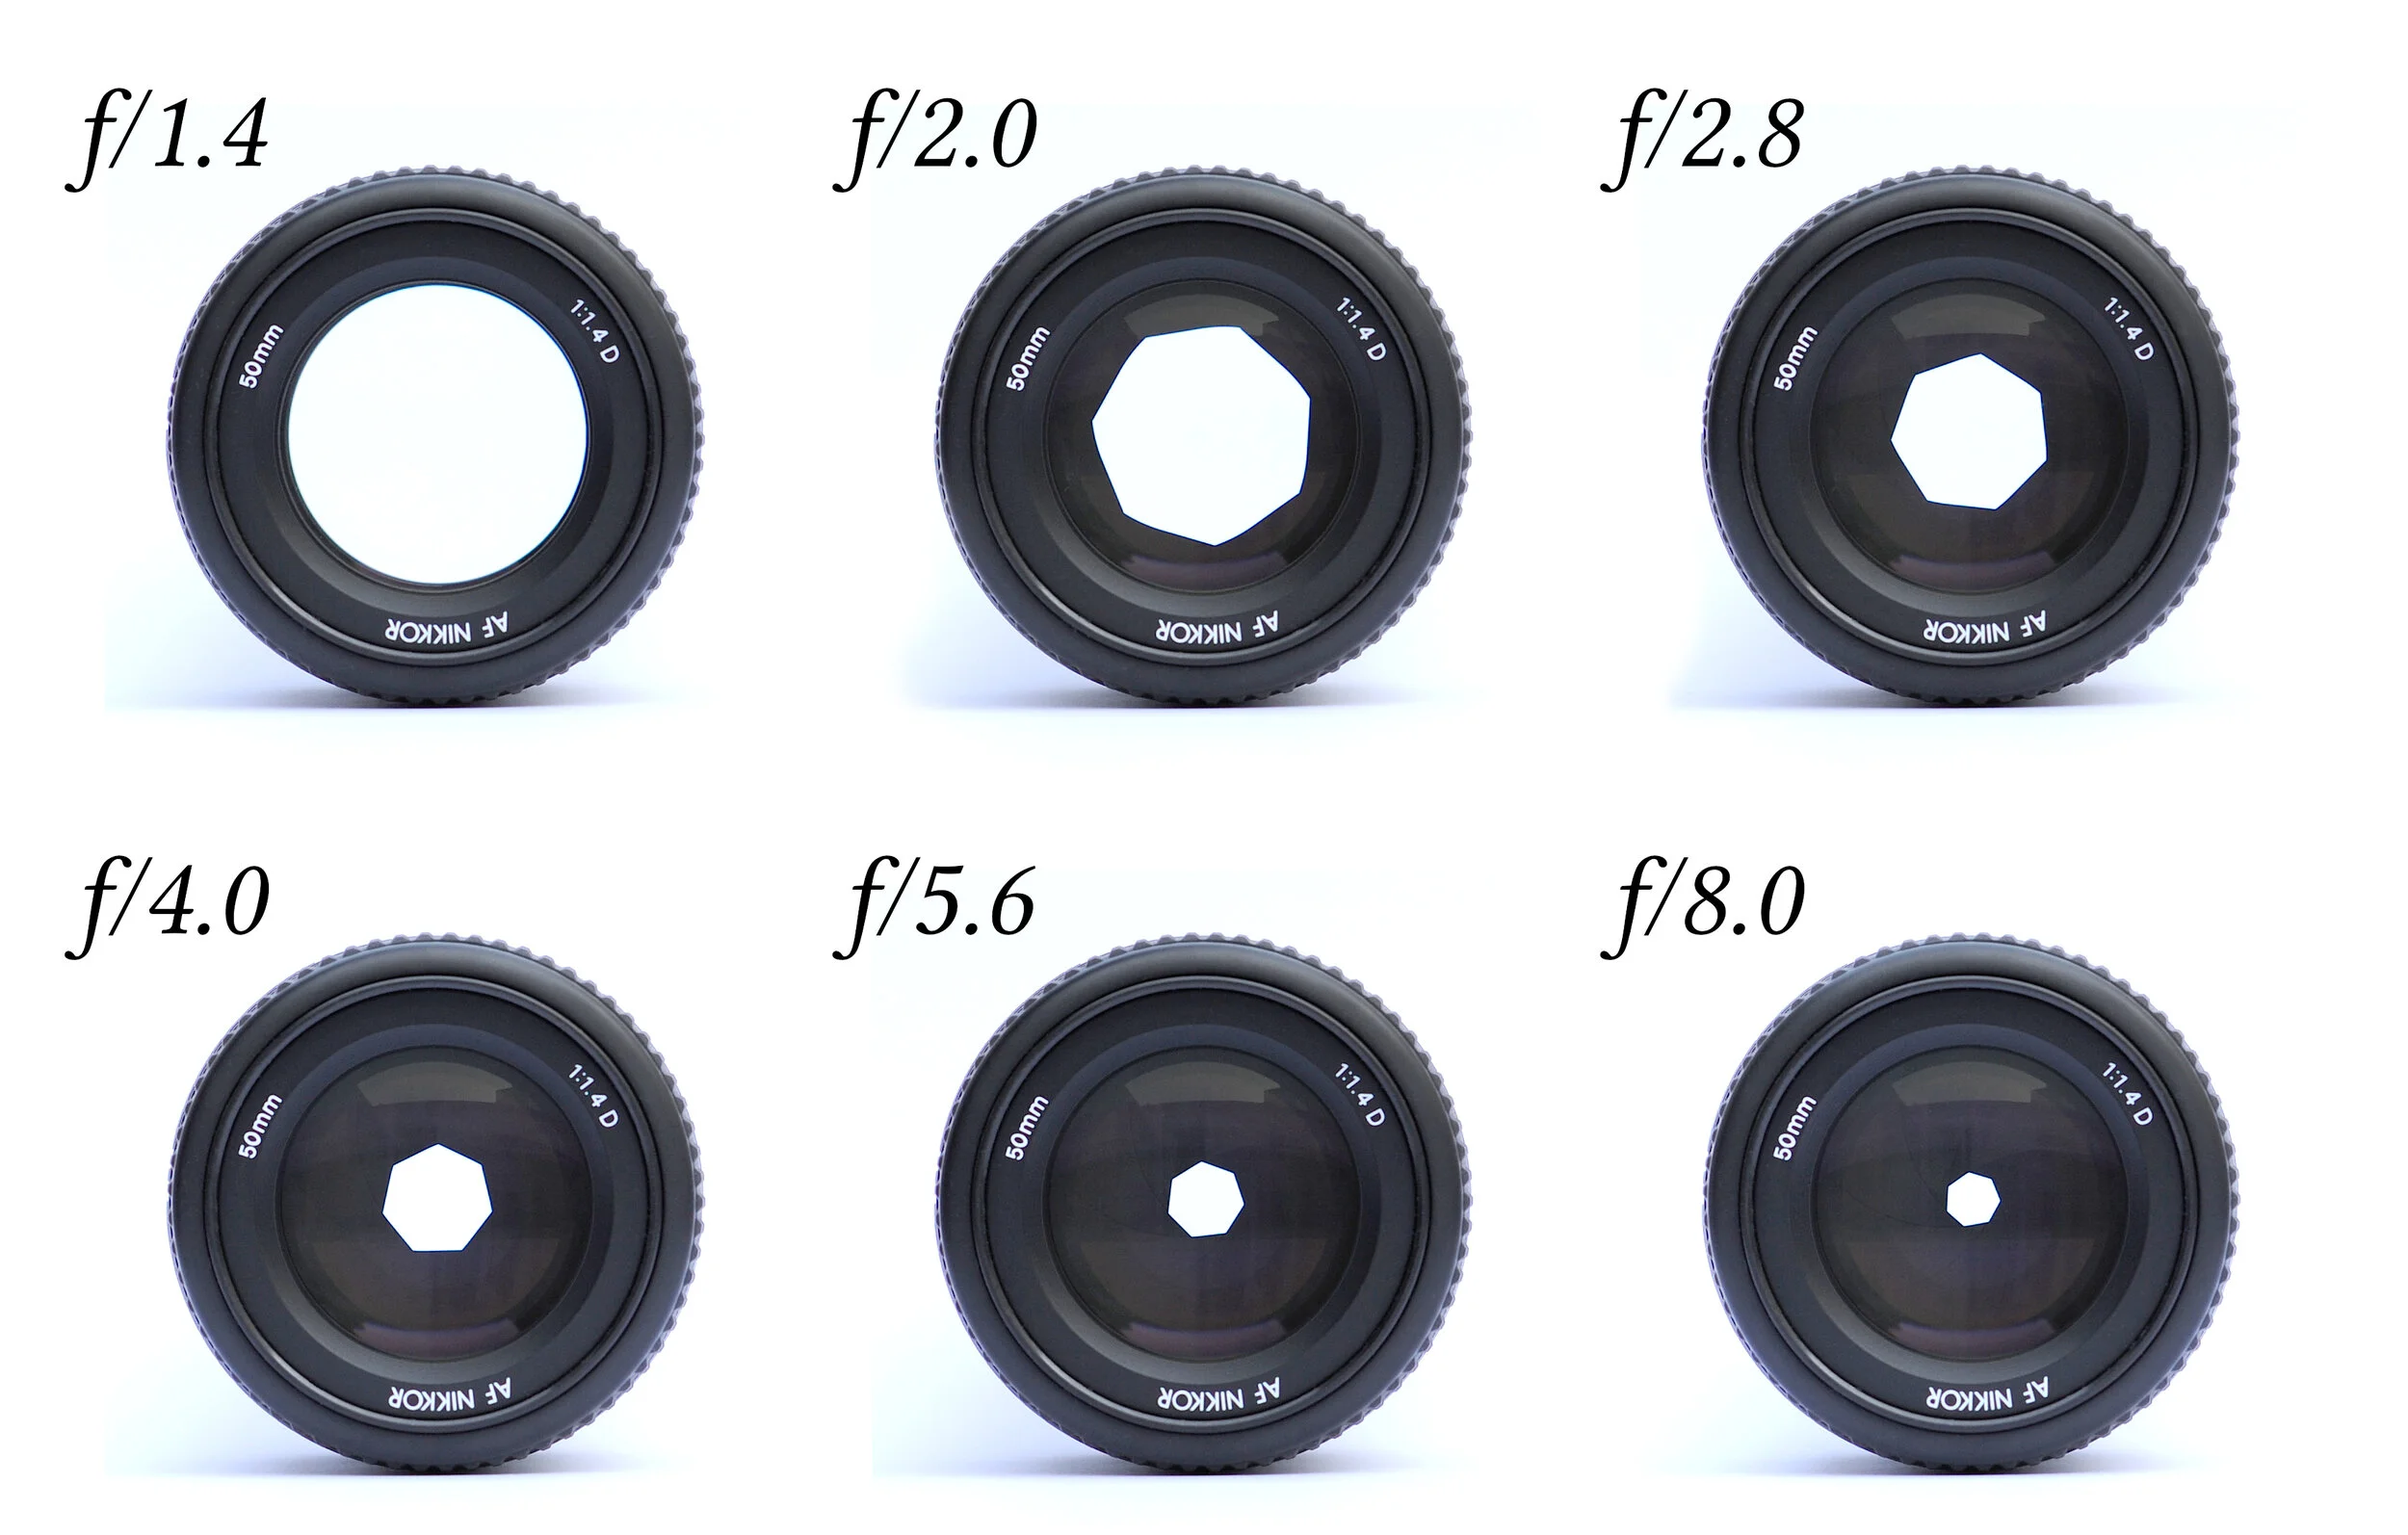
By KoeppiK – CC BY-SA 4.0, Wikimedia
For context, an f/2.8 lens is generally considered to be a great low-light option for wildlife photography. An f/2.0 lens lets in twice as much light, while the f/1.8 (not shown) lets in half as much as that again. That’s extremely useful in low-light situations, which is… most of my wildlife photography.
Once the sun has gone down, or we move under the forest canopy, you lose light quickly. When that happens, you have to either slow down the shutter speed or increase ISO to achieve a good exposure. By allowing more light in through the lens, you can maintain a fast shutter speed, enabling a higher chance of sharp photos if an animal is moving, or you can use a lower ISO to improve image quality. That helps you continue to get great shots when others have already packed up to go home.
How I use the 135 mm GM for wildlife photography
I’ve tried to select a few example photos that speak to these abilities.
Korora (blue penguins) return to shore after dark at Blue Penguins Pukekura, near the tip of the Otago Peninsula. There are a couple of lights to help outline the birds as they return, but it’s nighttime. Tough photography conditions.
With the 135 mm, I was still able to autofocus completely normally, and get some nice shots of these cute little fish assassins. Sweet!

Korora (blue penguin), Pukekura Bay, Otago. Sony 135 mm GM lens, Sony A7R III camera. f/1.8, 1/200 sec, ISO 8000.
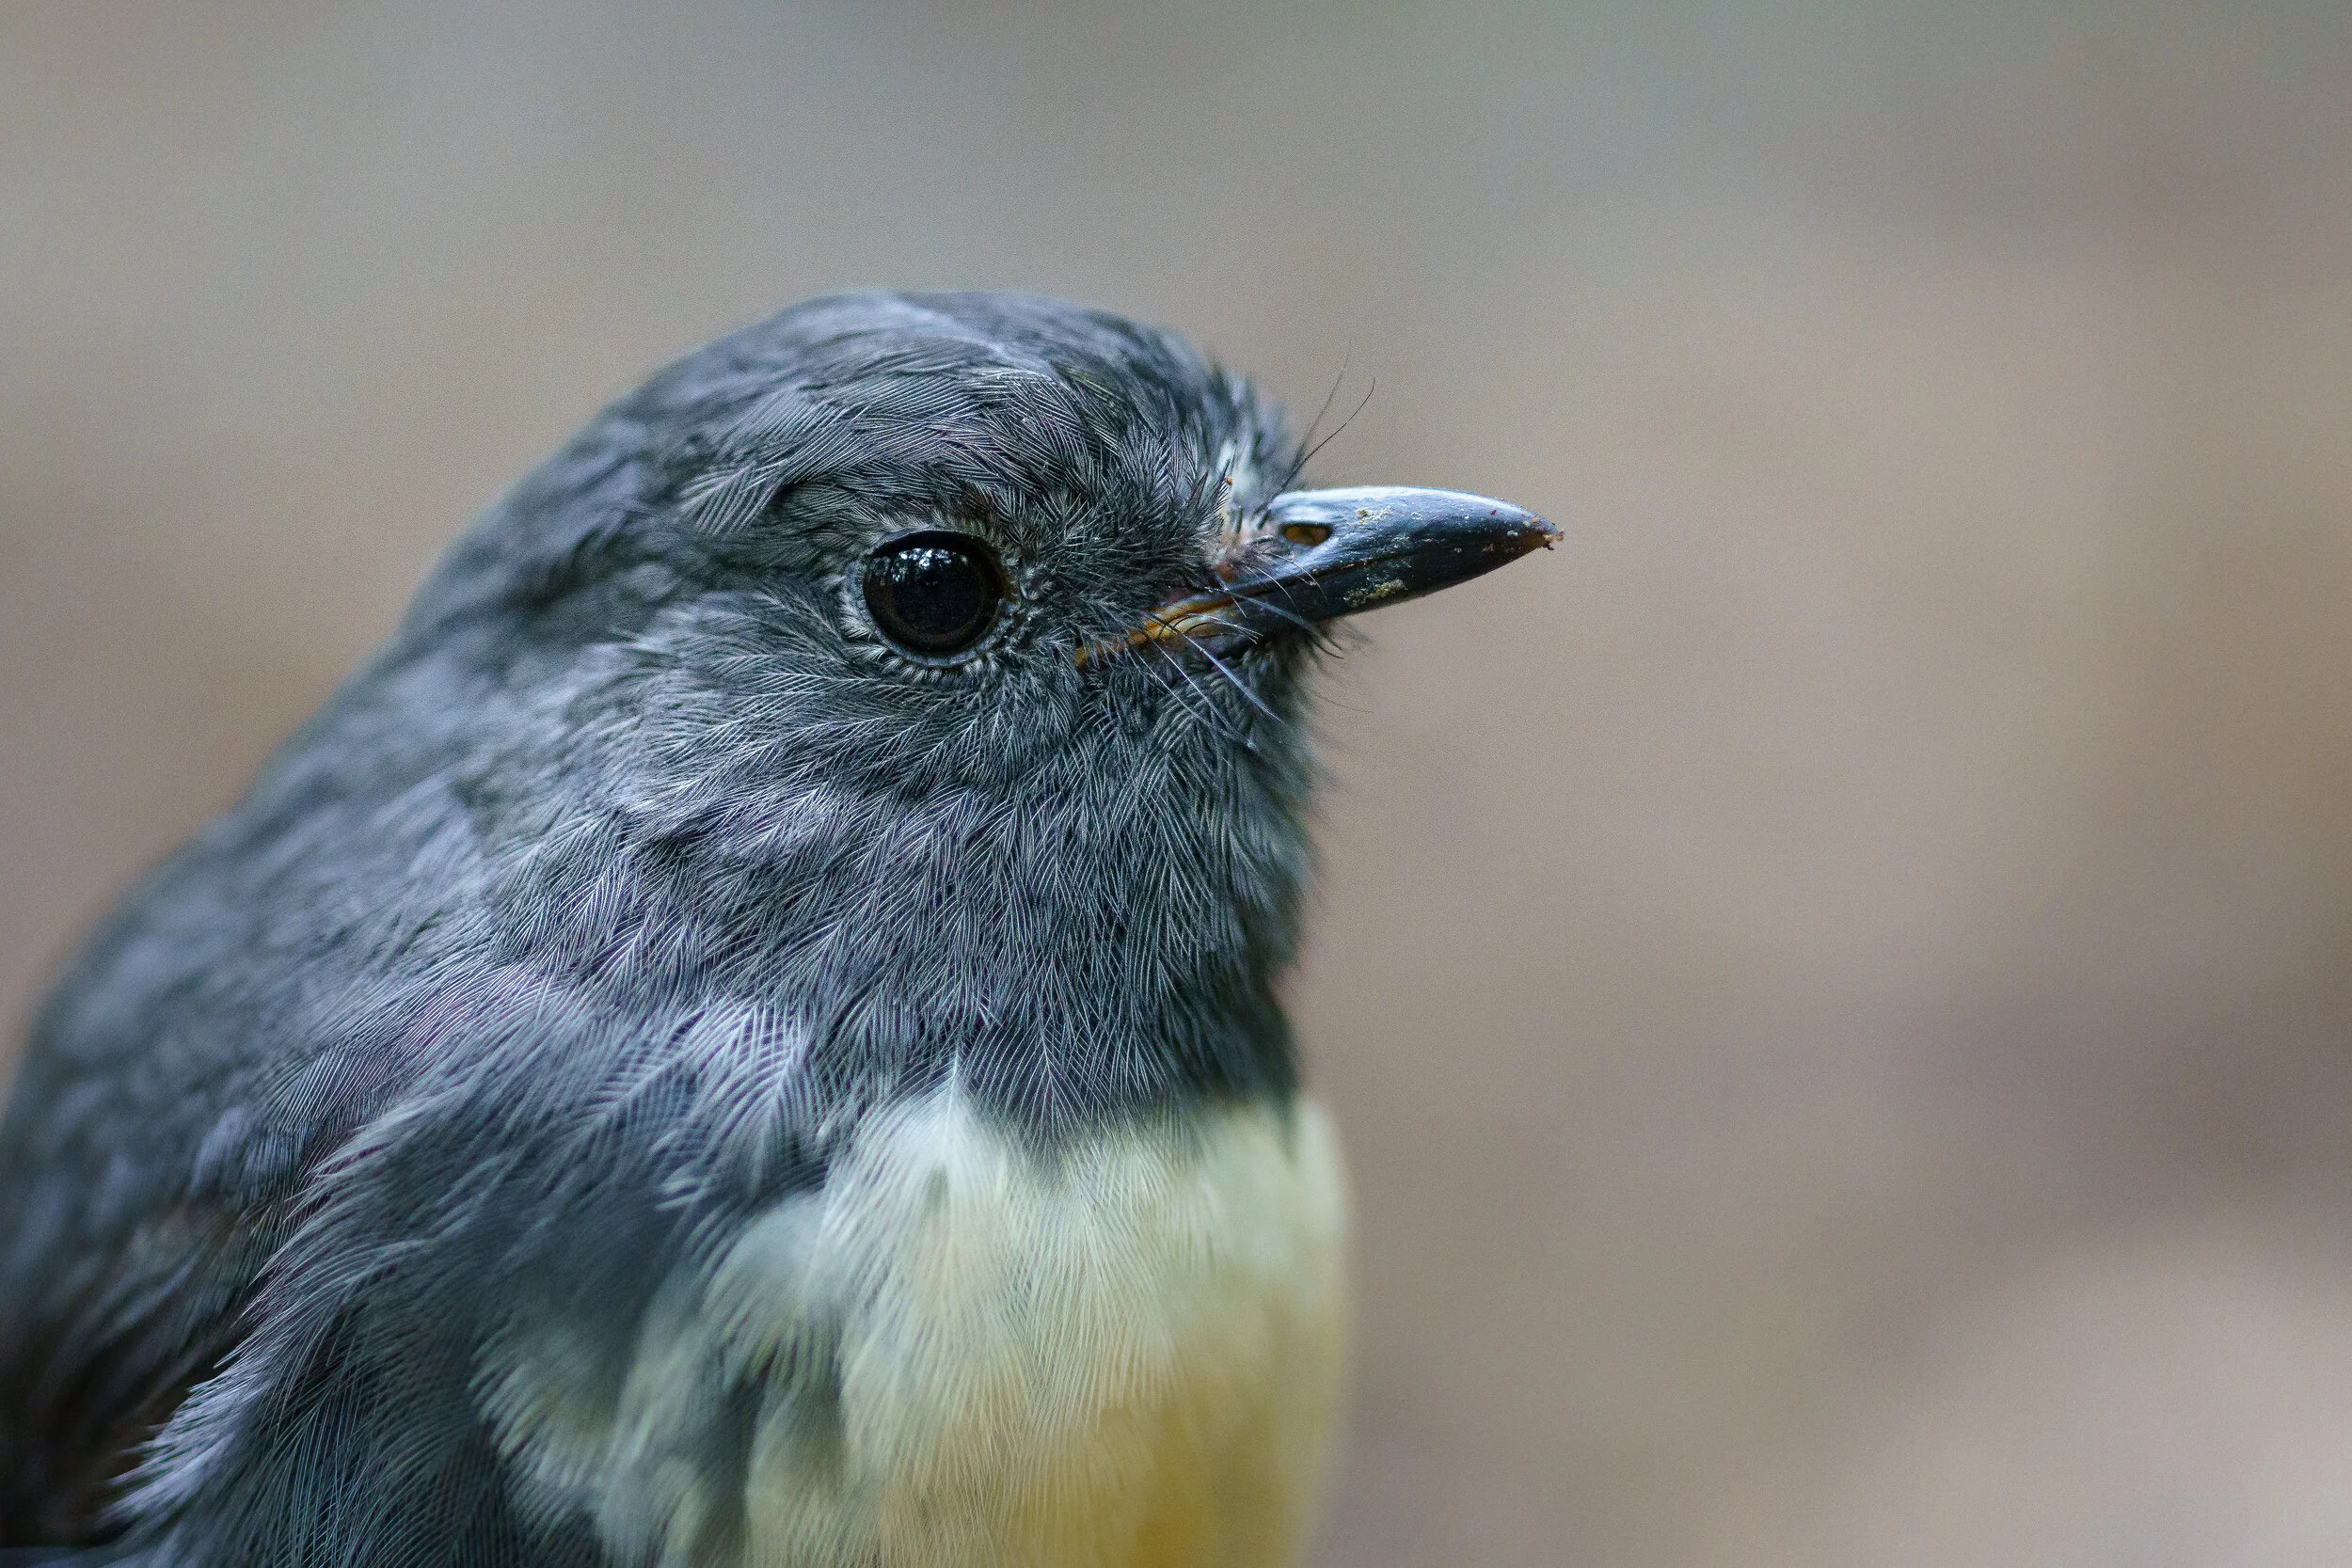
A second opportunity to use the lens presented itself on a dreary day at Orokonui Ecosanctuary, just north of Dunedin. Mist eclipsed the sun in the late afternoon, but I still wanted to explore the forest (pure masochism), so I put on the 135 mm.
I can’t emphasise enough how nice it was to be able to get usable shots under conditions that normally would have seen me pack up and go home.

Toutouwai, Orokonui, Otago. Sony 135 mm GM lens, Sony A7R IV camera. f/1.8, 1/320 sec, ISO 4000.
When you haven’t got an interesting background, it’s also nice to be able to use the shallow depth of field to blur everything but the subject (in this case, the wonderful Otago skink).
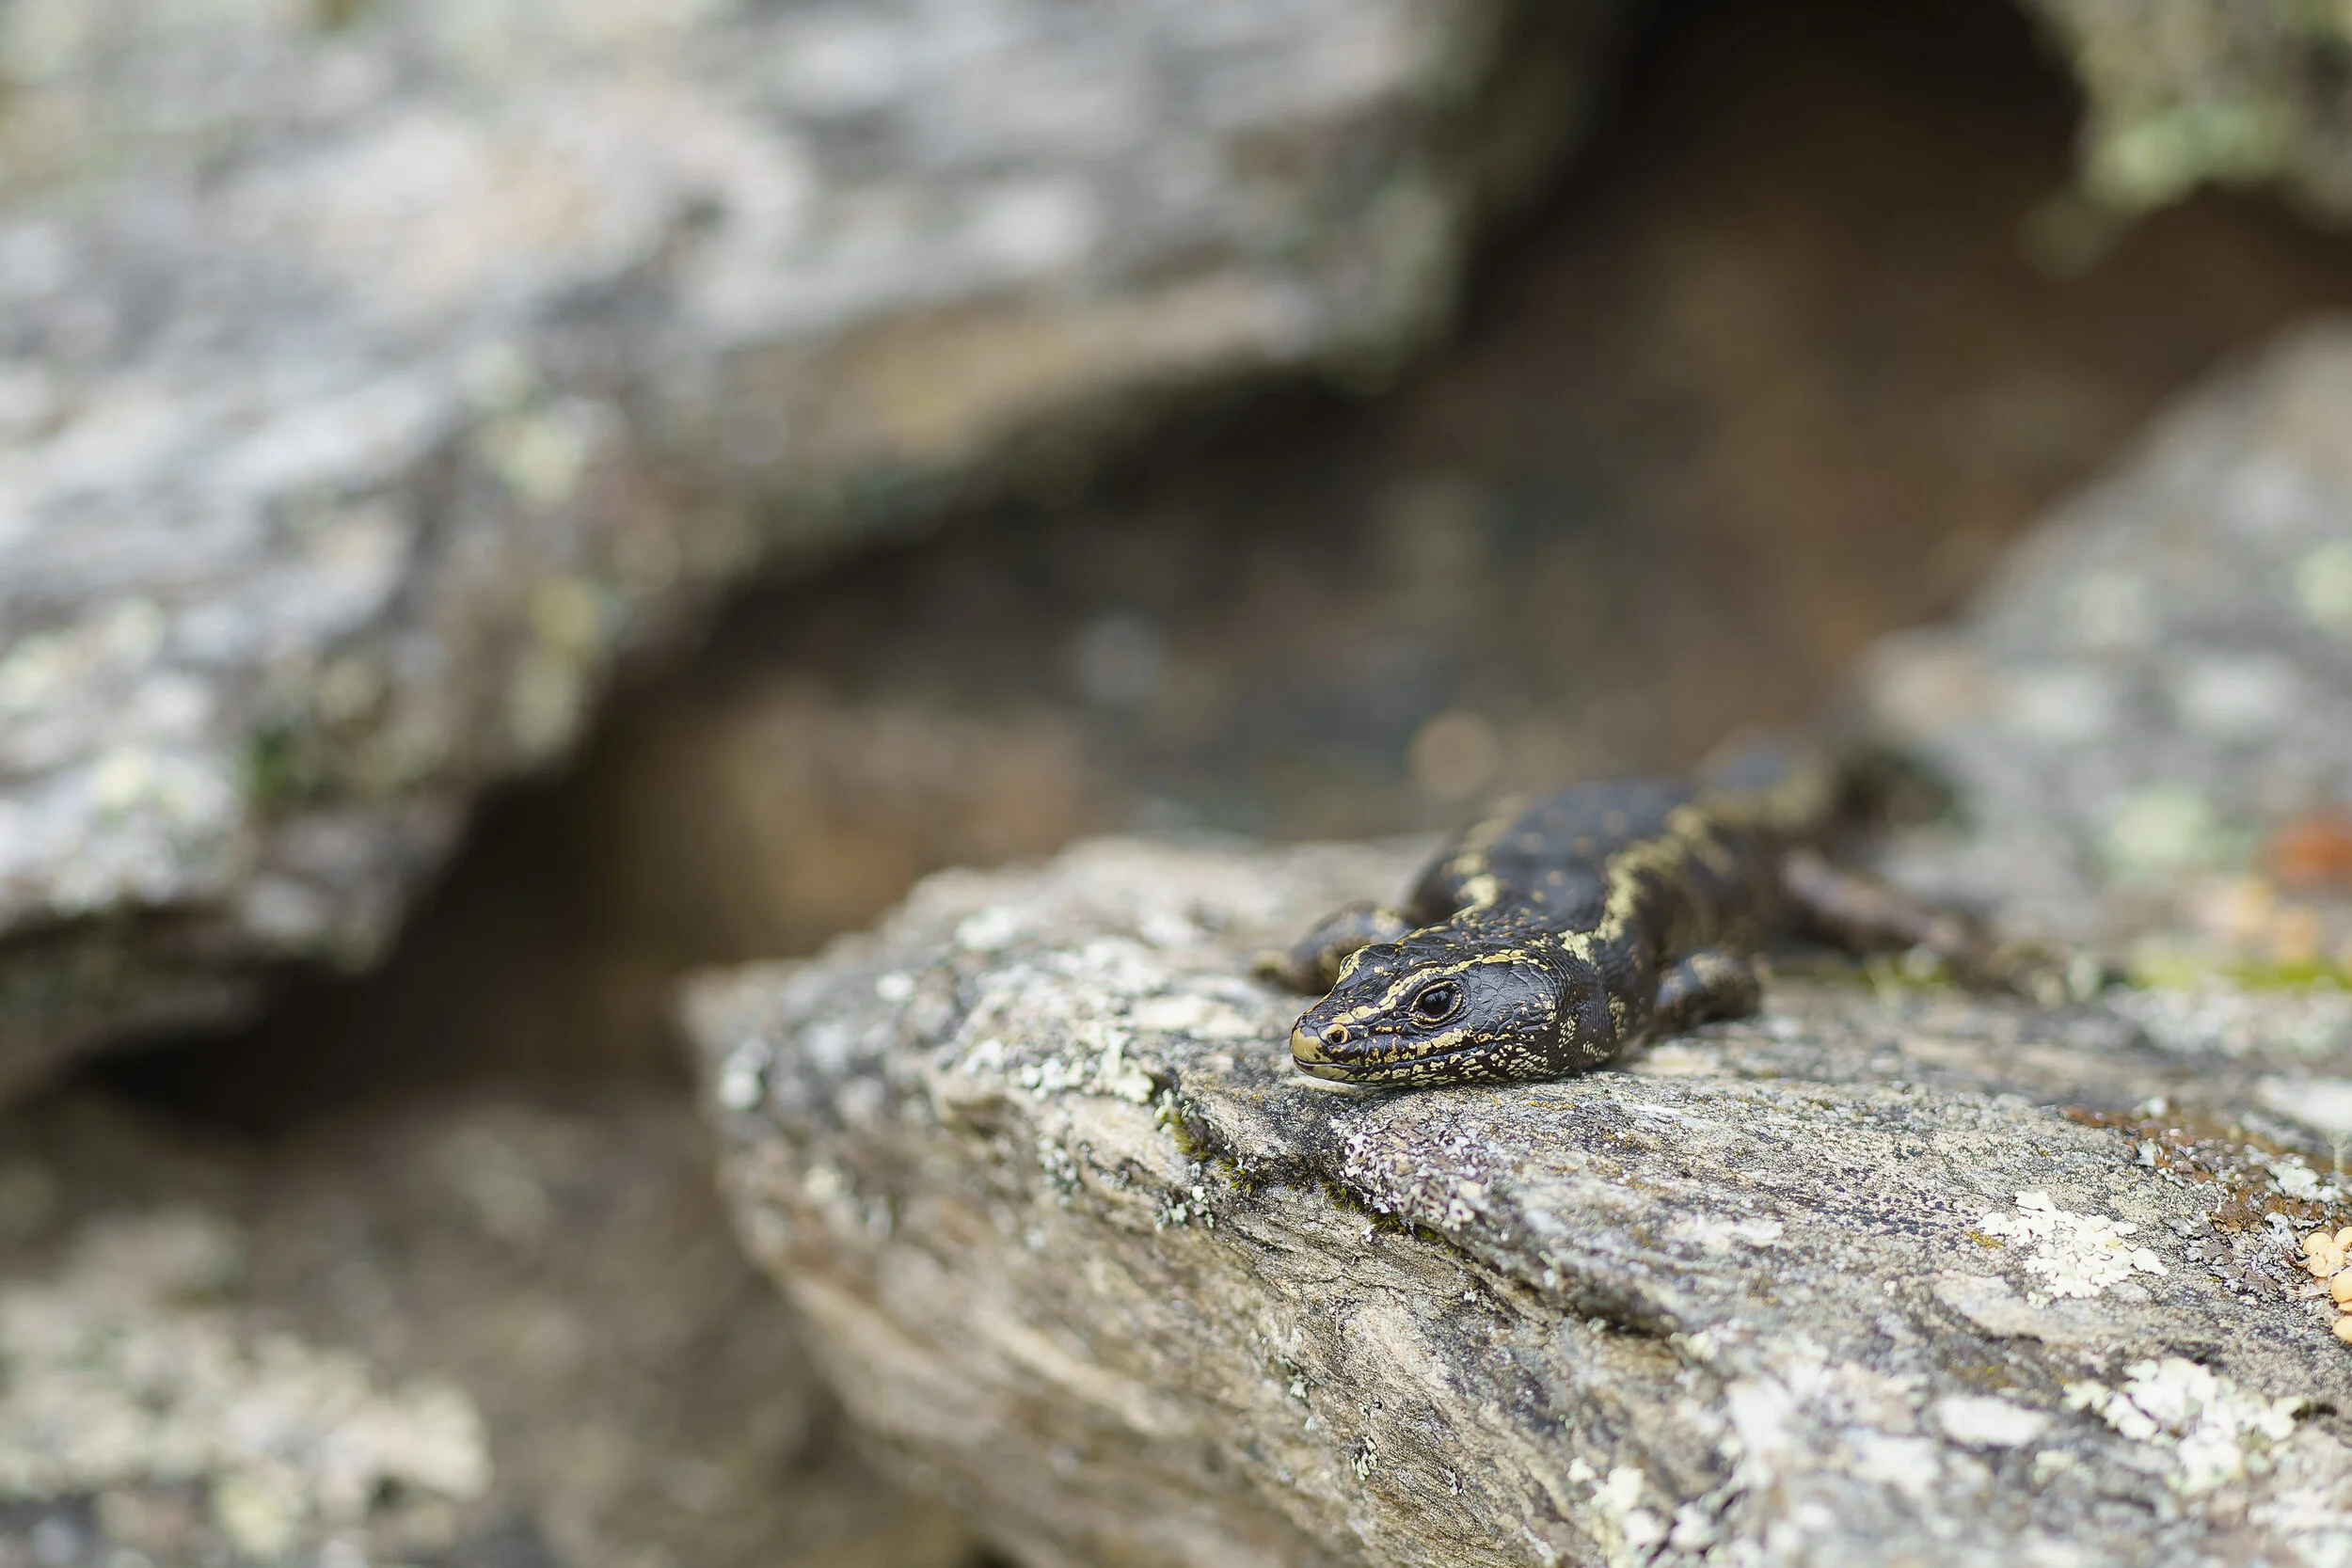
Otago skink, Orokonui, Otago. Sony 135 mm GM lens, Sony A7R IV camera. f/1.8, 1/500 sec, ISO 100.
I really enjoyed using the 135 mm as a bit of a fresh challenge. The lens opens up a lot of opportunities for low light photography, which is a ton of wildlife photography!
Practical tips
At f/1.8 you have a razor-thin depth of field which, to a large extent, is the point of this lens. It does add a challenge though – it’s not just a case of ‘is the eye in focus’, it’s ‘is the front or the back of the eye in focus’. I found that even Flexible Spot S wasn’t always a fine enough point to ensure I had perfect focus on the eye of small animals like the Otago skinks. With that reality, you are going to miss focus sometimes due to shaky hands or subject movement.
Knowing that to be the case, I used the 135 mm GM in ‘bonus time’ – once I thought I had a few good shots of a particular subject or locality, I switched to this lens to add a few unique shots that are difficult to replicate with other gear. As eye autofocus continues to evolve and improve for wildlife, it is going to pair very well with this lens.
The ‘Focus Hold’ button on the side of the lens is always useful. I program in custom settings to this button using the ‘Recall Custom Hold’ option, which Sony Ambassador Mark Galer explains below. I often use it as a way to switch to the Zone focus mode, as I find that helpful for ground-level shots (like the robins above).
Is the 135 mm GM lens right for you?
Perhaps! If you’re already pretty sure you want this lens, you are correct. For the rest of you:
Is 135 mm ‘enough lens’ for you? It was great for relaxed, friendly birds like some of the NZ natives, but if you’ve already got a telephoto zoom it’d be worth checking your Lightroom metadata to see what focal length range your favourite shots tend to be in. If 135 mm is within those bounds, this is a spectacular lens – and if you use a high-resolution sensor too (I was using this with Sony A7R III/IV bodies) then you’ll have a lot of latitude for cropping-in as well.
If you’ve invested in one of Sony’s high-resolution cameras, such as the A7R III / IV, or the A1, you want to be using Sony’s top lenses as well to maximise the resolving power of these amazing sensors – especially if you’d like the ability to make big prints. As a G Master lens, the 135 mm also has Sony’s latest autofocus technology, allowing it to keep up with the 30 fps of the A1 camera.

South Island takahe, Orokonui, Otago. Sony 135 mm GM lens, Sony A7R IV camera. f/1.8, 1/640 sec, ISO 125.
Hope that helps!
Simon.